You don’t need a fancy camera, expensive props, or a studio full of lights to make your Instagram feed stand out in 2025. In fact, some of the most engaging and beautiful posts I’ve seen were taken in small rooms, on phones, using nothing but daylight and a little creativity.
If you’ve ever looked at someone’s perfectly styled photos and thought, “I wish I could do that at home,” you absolutely can. This guide is all about helping you get started with aesthetic DIY photography using whatever space you have, and maybe even have a little fun along the way.
What Does “Aesthetic” Really Mean?
Let’s be honest—everyone throws the word “aesthetic” around on Instagram. But what it really means is vibe. It’s about having a consistent look or mood across your photos. Whether you’re going for soft and dreamy, bold and colorful, or minimalist and clean—your aesthetic is your visual identity.
The point? You don’t need to be a professional photographer. You just need to know your vibe and stick to it.
Step 1: Decide Your Visual Style
Start by figuring out what kind of content you love and what reflects your personality. Are you more into cozy, candle-lit corners or clean white backgrounds and latte art?
Some popular home photo aesthetics:
- Cozy + Warm – Think blankets, books, and tea mugs by the window.
- Pastel Dream – Light pinks, baby blues, soft yellows.
- Dark + Moody – Shadows, low light, earthy tones.
- Minimalist – White walls, clean surfaces, few objects.
- Color Pop – Bright backgrounds, bold outfits, neon signs.
Pick 1–2 styles that reflect you. When your feed is consistent, people are more likely to follow and engage.
Step 2: Set Up a Mini Studio at Home
You don’t need an entire room. A corner by the window is often enough.
Look for: Copyright-Free Image Sources for Bloggers
- Natural light (mornings or late afternoons are best)
- A plain wall, curtain, or bedsheet as a backdrop
- A stool, table, or chair to place items
You’d be surprised what you can do with just a clean wall, some sunlight, and a coffee mug.
💡 Try this: I once used an old white bedsheet and a pile of books to hold my phone in place. The results? My most shared photo that month.
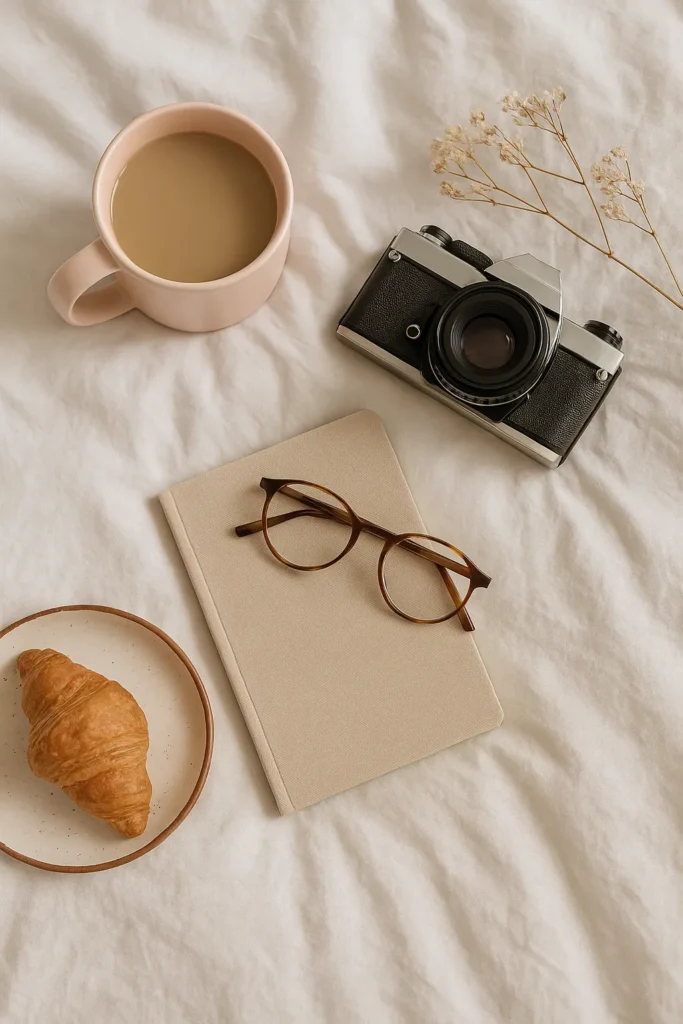
Step 3: Use What You Already Have as Props
Your house is full of photo-worthy props if you start looking creatively:
- Books, coffee mugs, notebooks
- Pillows, blankets, plants
- Sunglasses, makeup items, candles
- Food, fruits, flowers
- Jewelry, perfume bottles, gadgets

Don’t overthink it—what you want is a story in a single image. A cup of coffee by a window with a notebook says “slow morning vibes.” That’s your aesthetic.
Step 4: Match Outfits to Your Mood
Clothing is a big part of the photo. If you’re shooting a soft, pastel vibe, avoid bright red. If your style is clean and modern, go for neutrals and structured lines.
👗 Tip: Avoid big logos or distracting patterns. Solid colors work better and help keep the attention on the full scene.
Sometimes I lay out my clothes ahead of time and take test shots before changing into them—it helps save time and surprises.
Step 5: Think About Composition
It’s not just what you shoot, but how you shoot it.
- Use the rule of thirds (turn on your phone’s grid)
- Leave some empty space if your vibe is minimal
- Frame with objects—like plants in the foreground
- Play with symmetry—center things when it feels right
Try different angles—stand on a chair, lie on the floor, shoot through a mirror. The same spot can give you five unique photos with just a shift in perspective.
Step 6: Use Your Phone Like a Pro
Your phone is already powerful. Use these tips:
- Clean the lens (you’ll thank me later)
- Tap to focus and drag to adjust brightness
- Use portrait mode for a nice blur
- Avoid zooming—move closer instead
- Turn off the flash and stick to natural light when possible
Some phones now even have RAW mode—try it out if you want more control in editing.
Step 7: Edit Without Losing the Natural Feel
Editing is where the aesthetic really comes alive. But don’t go overboard.
Great apps to start with:
- Snapseed – Easy touch-ups, selective edits
- Lightroom Mobile – Presets for consistent looks
- VSCO – Film-style filters, soft and moody tones
Focus on small tweaks: brighten, soften shadows, maybe add a hint of warmth or a touch of fade. I usually create a few presets and apply them to keep my feed consistent.
Step 8: Captions That Connect
A picture might get someone to stop scrolling—but your caption keeps them there.
Some good ideas:
- Short, relatable stories
- Mood-setting quotes
- Fun questions to spark engagement (“Tea or coffee?”)
- Life updates or honest thoughts
And yes, hashtags matter. Mix a few big ones like #aestheticfeed or #cozyhomevibes with niche ones like #homestudiophoto or #flatlayfun.
Step 9: Batch Your Content
The key to an aesthetic feed is consistency. One good photo a week won’t cut it if you want to grow. Instead:
- Pick 1–2 days a week to shoot multiple photos
- Use scheduling tools like Later, Planoly, or Preview
- Arrange your posts visually to see how they’ll look on your feed

I keep a little idea board in Notion with themes like “books + tea,” “rainy day selfie,” or “pink outfits.” When I feel stuck, I just pick one and shoot.
Step 10: Keep Learning, Keep Creating
Follow creators you admire, save photos that catch your eye, and try to figure out why they work. Then practice those techniques with your own twist.
Try new things. Shoot in black and white. Use fairy lights. Make your own filters. Recreate a Pinterest photo using only things from your house.
📸 DIY Challenge: Take one object (like a plant or book) and photograph it in five completely different styles. You’ll be amazed how much you can do in one space.
Final Thoughts
You don’t need a studio, DSLR, or influencer lifestyle to take beautiful photos at home. You just need to start. Use what you have. Follow the light. Learn what you love. Over time, you’ll develop your own aesthetic, and it will start to show in every photo you post.
I’ve seen creators build entire personal brands from their bedrooms and balconies—and you can too.
So take that first shot. Edit it with love. Post it with a smile. And trust the process.
Your story deserves to be seen—make it beautiful, make it yours. 🌿✨
👤 Author Bio: Gurpreet Singh
Gurpreet Singh is the creative mind behind TheBestImages.com, where visual content meets purpose. With a deep love for storytelling through images, Gurpreet turned a personal passion for photography and blogging into a growing online resource for creators, bloggers, and business owners looking to make their visuals work smarter — not harder.
Having spent years experimenting with image SEO, thumbnail psychology, and color strategy, Gurpreet now shares proven tips that help others get more clicks, more engagement, and even passive income from the right visuals. From DIY designs to stock image secrets, every piece of content is written with a goal: to simplify the complex world of images for real people.
When he’s not crafting detailed guides, Gurpreet enjoys researching aesthetic trends, testing image tools, and capturing everyday beauty with just a phone camera. His work is grounded in real experience, not fluff — and it shows in the results his readers get.
📍 Based in India, Gurpreet believes every creator — no matter their gear or budget — can master the art of visual storytelling.