From Zero to Viral: How I Grew My Image Blog Organically Without Spending on Ads
When I started my image blog, I had no budget, no followers, and absolutely no clue about SEO. All I had was a passion for photography and a belief that great images can speak louder than words. Fast forward to today, that small blog has grown into a steady stream of traffic, engagement, and income — all without spending a single rupee on paid advertising.
This is not a get-rich-quick story. It’s a step-by-step journey of how I built my image blog organically, using only free tools, smart strategies, and a lot of consistency. If you’re just starting or struggling to grow your blog, I hope my story helps you see what’s possible — even with zero budget.
📍Starting Point: A Niche, A Name, and a Folder of Images
I had been casually shooting photos on my smartphone for years — mehndi designs, festive decor, street scenes, everyday textures. One day, I decided to organize those photos and publish them online.
But instead of uploading everything randomly, I asked myself:
“Who would actually need these images?”
That question changed everything. I realized there were thousands of bloggers, small businesses, and content creators looking for copyright-free, culturally relevant, high-quality images — especially in niches like:
- Traditional fashion (like Punjabi suits, mehndi, jewelry)
- Indian festivals
- Background textures
- Minimalist flat-lay setups
So I picked a tight niche: desi lifestyle visuals — and registered a domain.
I didn’t overthink the name. It was short, keyword-friendly, and made sense to the audience I wanted to reach. That was enough to get going.
🧩 Step 1: Organizing Content Like a Human, Not a Bot
Before uploading anything, I made sure my photos were:
- Renamed with descriptive file names (e.g.,
bridal-mehndi-punjabi.webp) - Resized and compressed for fast loading (using Squoosh and TinyPNG)
- Categorized into themes like “Front Hand Mehndi,” “Punjabi Bridal,” “Background Textures”
This helped Google (and users) understand my blog better.
I also avoided uploading too many similar images. One strong image per idea was enough. The rest could go on Pinterest or Instagram.
📝 Lesson:
It’s not about quantity. It’s about structure and clarity. Organize your content the way you would like to browse it if you were a visitor.
💻 Step 2: Writing Descriptions That Didn’t Sound Robotic
Here’s a big mistake many image websites make: they either write no text at all or they write copy-pasted, keyword-stuffed gibberish.
I did the opposite.
For every image post, I wrote:
- A short story or mood (like “This bridal look captures the quiet elegance of a winter wedding.”)
- A mention of where/why it’s useful (Pinterest pins, festive blogs, reels thumbnails)
- A few keywords naturally placed in sentences
For example, for an image showing a Punjabi girl in yellow lehenga with mehndi, I didn’t just say “mehndi design.”
I wrote:
“This simple yet stylish mehndi design is perfect for brides looking for an elegant Punjabi look. The yellow lehenga adds warmth, while the jewelry adds royal flair.”
It sounds human. It’s easy to read. It also has the right keywords.
📝 Lesson:
Don’t write for bots. Write like you’re recommending this image to a friend.
📈 Step 3: SEO — The Free Game-Changer
Here’s how I made Google my best traffic source, step by step:
✅ I Picked Easy Keywords First
Instead of targeting “mehndi design” (too competitive), I targeted:
- mehndi design for kids
- mehndi with name
- punjabi girl in lehenga showing mehndi
- desi background texture for blogs
These are low competition, long-tail keywords. They might get only 200–500 searches per month — but when you rank for 50 of them, the traffic adds up.
✅ I Used On-Page SEO Basics
- Image ALT text with descriptions
- Headings like
<h1>,<h2>with keywords - Meta description that sounded clickable
- Internal links (e.g., “See more Punjabi bridal looks here.”)
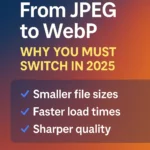
I also used WebP format for all images, as Google loves fast-loading content.
📝 Lesson:
You don’t need to be an SEO expert. Just learn the basics and apply them consistently.
📌 Step 4: Pinterest – The Unsung Hero of Free Traffic
While many bloggers run to Instagram, I quietly built my Pinterest boards.
Every blog post had:
- 2–3 Pinterest graphics
- Vertical ratio (2:3)
- Text overlay like “Elegant Mehndi Design for Punjabi Brides”
- Link back to my blog
I scheduled pins using Tailwind (free plan). Some pins went viral within a few weeks and brought in over 2,000 visitors in a single day.
Pinterest is an image-first search engine — not a social media app. Treat it like Google, and it will reward you.
📝 Lesson:
If your content is visual, Pinterest is your best friend. It’s free, evergreen, and still underused.
🛠️ Step 5: Using AI Without Looking Like AI
Yes, I used AI. But not to fake everything. I used it to speed up creative tasks:
- ChatGPT: Helped me rewrite photo descriptions in human tone
- Canva AI: Created Pinterest pins and YouTube thumbnails
- DALL·E / Bing Creator: Occasionally filled content gaps (e.g., “background texture with lotus pattern” when I didn’t have my own)
But I always edited and added personal touch to keep it original.
AI was a helper — not the star.
📝 Lesson:
Use AI smartly. Don’t replace your creativity — enhance it.
📊 Step 6: Tracking What Works and Doubling Down
Once I had 30–40 posts live, I checked Google Search Console.
I found that:
- “Punjabi bridal front hand mehndi” was bringing steady clicks
- “Simple mehndi for kids” had a high CTR
- “Background photo for Indian blog” had 200 impressions but low ranking
So I:
- Created more posts around bridal front-hand looks
- Updated the kids mehndi post with more examples
- Optimized the background post title and internal linking
This wasn’t overnight. It took weeks. But small improvements led to big results.
📝 Lesson:
Success isn’t just about creating more — it’s about improving what’s already working.
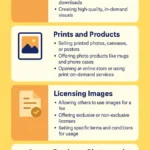
💰 Bonus: How I Monetized Without Ads
Before I got AdSense approval, I added:
- A “Download Image” button that asked for email sign-up
- A Gumroad shop with exclusive packs like “30 Pinterest-Ready Mehndi Graphics”
- Affiliate links to Canva, WordPress themes, and editing tools
I made my first ₹1,500 through Gumroad sales — from just 3 buyers. That was the moment I realized this blog had potential.
📝 Lesson:
You don’t need ads to start earning. If your images solve a problem, people will pay.
🙋♂️ Real Talk: What I Wish I Knew Earlier
- Consistency beats perfection. I wasted time tweaking fonts and forgot to publish.
- One image can go viral. A single photo of a cute kid’s hand mehndi got shared by 5 parenting blogs.
- Don’t copy big sites. What works for them won’t work for a beginner. Your edge is personal tone and unique visuals.
- Backups are gold. I lost 30 posts due to a plugin bug. Now I keep everything on Google Drive too.
📌 Summary So Far
Let’s recap what I did — and what you can start doing today:
| Step | Action |
|---|---|
| ✅ Picked a niche | Desi lifestyle visuals |
| ✅ Organized content | Renamed, categorized, compressed images |
| ✅ Wrote real descriptions | No keyword stuffing, human tone |
| ✅ Focused on SEO | Long-tail keywords, ALT text, fast loading |
| ✅ Used Pinterest | Free traffic powerhouse |
| ✅ Used AI wisely | Helped, but didn’t replace me |
| ✅ Tracked performance | Doubled down on what worked |
| ✅ Monetized early | Even before AdSense approval |